Best Bobber Stop Setup
It’s happened to all of us: you’re out on a beautiful Iowa lake, the bite is on, and you’ve got your slip bobber perfectly positioned over that sweet spot where you know the crappie are hiding. Then, suddenly, your bobber stop slips. Your bait sinks too deep, or worse, your line gets tangled, and the magic moment is gone. Frustrating, right? Getting your bobber stop setup just right is a game-changer for consistent catches, ensuring your bait stays exactly where you want it. This guide will walk you through everything you need to know to master the art of the bobber stop, making your next fishing trip in Iowa far more productive and, frankly, much less exasperating.
Understanding Bobber Stops: Why They Matter
Many anglers, especially when starting out, might overlook the humble bobber stop, thinking any old knot or piece of rubber will do the trick. But seasoned Iowa fishing enthusiasts know better. The bobber stop is the unsung hero of many successful fishing rigs, particularly when using slip bobbers. It's the critical component that dictates how deep your bait is presented, and getting it wrong can mean the difference between a loaded livewell and a quiet, fishless day.
The Frustration of Improper Depth Control
Imagine you're targeting bluegill in a brush pile at Lake Macbride. You know they're holding about five feet down. You cast out, the bobber settles, and you wait. But if your bobber stop isn't holding firm, your bait might be drifting down to six, seven, or even eight feet, completely missing the strike zone. This isn't just inefficient; it's genuinely frustrating. You're putting in the time, using the right bait, but because of one small, easily fixable detail, you're not getting bites. This kind of depth inconsistency can ruin a fishing trip, especially when you're trying to fish around specific structures or submerged cover.
Conversely, a bobber stop that's too tight or improperly seated can lead to line damage. You might reel in a fish, only to find your line has been crimped or weakened, potentially leading to a lost fish on the next cast. For anyone who’s spent hours meticulously setting up their gear, only to have a small component fail, the frustration is palpable. Whether you're chasing shallow panfish in farm ponds or trying to present a minnow to a deeper walleye in Clear Lake, precise depth control is paramount, and it all starts with a reliable bobber stop.
The Role of a Bobber Stop in Effective Fishing
At its core, a bobber stop's primary role is to set and maintain the depth of your bait when using a slip bobber. Unlike fixed bobbers, which are clipped directly to your line at a specific point and limit casting distance with deeper presentations, slip bobbers allow your line to "slip" through them until it hits the stop. This means you can cast much further, even when fishing deep water, because your bobber slides down to your weight during the cast, and then floats up to the stop once the rig is in the water.
This versatility makes bobber stops indispensable. They allow you to quickly adjust your fishing depth based on where fish are detected, whether it's suspended crappie in a channel or walleye hugging a river bottom. Furthermore, a good bobber stop setup protects your main line from constant abrasion that might occur if the bobber were to rub directly against a knot tied for depth. By providing a consistent, adjustable point of resistance, bobber stops unlock a whole new level of precision and adaptability in your fishing strategy, especially in Iowa's diverse waters.
Types of Bobber Stops: A Closer Look
When you walk into a tackle shop, or browse online, you'll quickly realize there isn't just one kind of bobber stop. Each type has its own strengths and weaknesses, and understanding these differences will help you choose the best one for your specific fishing needs and the conditions you face on Iowa's lakes and rivers.
Thread or String Bobber Stops
These are probably the most common and widely recognized bobber stops. They usually come as small, pre-tied knots on a plastic sleeve or tube. To install, you simply slide your main line through the tube, pull the knot off the tube and onto your main line, and then tighten it down. The excess tag ends are then trimmed, leaving a small, adjustable knot on your line. You can often find these in multi-packs at stores like Bass Pro Shops or on Amazon.
The biggest advantages of thread stops are their adjustability and minimal impact on your cast. They slide relatively smoothly through most rod guides, making long casts with lighter line a breeze. They're also quite gentle on your line, causing less abrasion than some other types, which is a huge plus if you're using lighter monofilament or fluorocarbon. However, they can sometimes slip on very thin diameter lines, especially braided lines, if not cinched down properly. They can also be a little hard to see on the line, and over time, repeated sliding and tightening can cause the string to wear out, necessitating replacement.
Bead and Bobber Stop Combo
While not a "stop" in itself, a small bead is almost always used in conjunction with a thread or string bobber stop. This is a crucial detail many beginners miss. The thread stop is quite small, and if you just put it on your line with a slip bobber, the bobber's line hole would likely be larger than the stop itself, allowing the bobber to slide right over it. The bead acts as a buffer, a larger piece that sits above your bobber, preventing the smaller thread stop from passing through the bobber's eyelet.
Using a bead with your thread stop offers several benefits. It ensures the bobber stays precisely where the stop is set, providing that crucial depth control. It also protects the thread knot from wear and tear as the bobber slides up and down during reeling and casting. Beads come in various sizes and colors, and choosing one that's slightly larger than your bobber's line hole is key. Some anglers even prefer brightly colored beads to help them spot their stop when making adjustments.
Rubber or Silicone Bobber Stops
Rubber or silicone stops are small, cylindrical pieces of material, often shaped like a football or oval, with a tiny hole through the middle. They usually come on a fine wire loop or plastic applicator for easy threading onto your main line. Once on, they are very secure and durable. You'll often find these alongside thread stops at your local tackle shop, sometimes in a small organizer kit that includes beads and swivels.
These stops are fantastic for their holding power; once you slide them into position, they tend to stay put, even with heavy casts or strong currents, which can be a real asset when fishing a river like the Mississippi. They are also quite durable and can be reused if handled carefully. The downside is that they can be a bit bulkier than thread stops, which might cause them to catch on smaller rod guides during casting or reeling. If pulled too tight, especially on lighter lines, they can also cause a slight crimp or weakening of the line, so gentle handling is key when adjusting their position. They are a good choice for Catfish Fishing in Iowa where heavier lines and weights are common.
Bobber Stop Knots (DIY)
For those who enjoy a bit of DIY or find themselves in a pinch without a pre-made stop, tying your own bobber stop knot directly onto your main line is always an option. This is typically done with a piece of heavier monofilament, braided line, or even dental floss, creating a snug knot that can be slid up and down the main line. Common knots for this purpose include the uni-knot, surgeon's knot, or a specific bobber stop knot.
The main advantage of tying your own is that it's always available, highly customizable in terms of material and size, and costs absolutely nothing. You can tailor the knot to the exact thickness of your line, potentially achieving a more secure fit than some universal manufactured stops. However, tying a consistent, secure, and small enough knot can be challenging for some. DIY knots can also be less durable than manufactured ones, and if not tied correctly, they can slip easily or, worse, damage your main line. For those looking for reliability and convenience, manufactured stops are generally preferred, but it's a useful skill to have in your back pocket.
Choosing the Right Bobber Stop for Your Iowa Fishing Adventure
Selecting the perfect bobber stop isn't a one-size-fits-all situation. Just like you'd pick different lures for How to Catch Walleye in Iowa versus How to Catch Crappie in Iowa, your bobber stop choice should align with your specific setup and target species. Think about the conditions on the water, the type of fish you're after, and the gear you're using.
Matching Stop Type to Line Type and Weight
Your fishing line is one of the most critical factors in determining which bobber stop will perform best. Different line materials and diameters interact with stops in unique ways.
For instance, if you're using heavier monofilament or fluorocarbon lines, which are relatively stiff and have a larger diameter, rubber or silicone stops often work wonderfully. Their firm grip can prevent slipping, and the line's stiffness helps resist any potential crimping from the stop. However, if you're using very light monofilament for subtle bites, a thread stop is often gentler on the line and less likely to weaken it.
Braided lines present a unique challenge. Their slick, thin nature means that some thread stops, especially those made of a smoother material, might struggle to get a firm grip and could slip. In these cases, you might need to use a thread stop with a coarser texture, tie a double knot with a thread stop, or opt for a rubber stop that provides more friction. Be cautious with rubber stops on thin braid, though, as overtightening could still cause damage. Sometimes, combining two thread stops a short distance apart can provide a more secure hold on braided line, creating a "sandwich" effect that's harder to dislodge.
Considering Species and Presentation
The fish you're targeting and the way you're presenting your bait also play a significant role. If you're going after panfish like bluegill and crappie in shallower waters, you're likely using lighter line and smaller hooks. In these scenarios, a smaller, less obtrusive thread stop with a tiny bead is often ideal. It won't spook the fish, casts smoothly, and offers enough holding power for light baits and minimal current. You want your presentation to be as natural as possible, and a bulky stop can sometimes hinder that.
On the other hand, if you're fishing for larger species like walleye or channel catfish, especially in areas with current like the Mississippi or Des Moines rivers, you'll probably be using heavier line, larger weights, and potentially bigger baits. Here, a robust rubber stop or a well-tied, heavy-duty thread stop is often necessary. These stops provide the secure grip needed to prevent your bobber from slipping under the strain of a heavier rig or a strong river current. For scenarios involving bigger fish or more aggressive presentations, durability and holding power trump subtle casting.
The Importance of Rod Guides
This is an often-overlooked but crucial aspect of bobber stop selection. The size of the guides on your fishing rod, particularly the tip guide, will dictate how smoothly your bobber stop passes through them. Many modern rods feature small, micro-guides designed for increased sensitivity and casting distance with light lines.
While thread stops are generally designed to pass through guides with minimal resistance, some bulkier rubber stops can get caught, especially if your guides are very small. This can lead to shorter casts, a jerky retrieve, and even damage to your guides or line over time. Before you head out, test your chosen bobber stop setup by reeling it all the way up to your rod tip. If it snags or catches, you might need to switch to a smaller stop or trim the tag ends of your thread stop even tighter. For Best Rod Length for Iowa River Walleye Fishing, where longer casts and smooth retrieves are beneficial, ensuring your bobber stop glides freely is essential. If you often cast long distances, prioritize stops that are streamlined and won't impede the line flow.
Step-by-Step Guide to Setting Up Your Bobber Stop
Setting up your bobber stop correctly is crucial for its effectiveness. A poorly installed stop can slip, tangle, or even damage your line. Let's break down the process for the most common types.
Installing a Thread/String Bobber Stop
Most thread bobber stops come pre-tied on a small plastic tube or wire loop, making installation fairly straightforward.
- Thread Your Line: Begin by passing the end of your main fishing line through the small plastic tube or wire loop that the thread stop is wrapped around. Make sure your line goes through the tube, not just under the knot itself.
- Slide the Knot Off: Once your main line is threaded, carefully slide the pre-tied thread knot off the plastic tube and onto your main line. You might need to hold both ends of the main line and gently push the knot off the tube.
- Cinch Down Gently: Now that the thread knot is on your main line, gently pull both ends of your main line away from each other to snug the knot down. Don't yank it too hard yet! You want it snug enough to hold its position but loose enough that you can still slide it up and down to adjust depth.
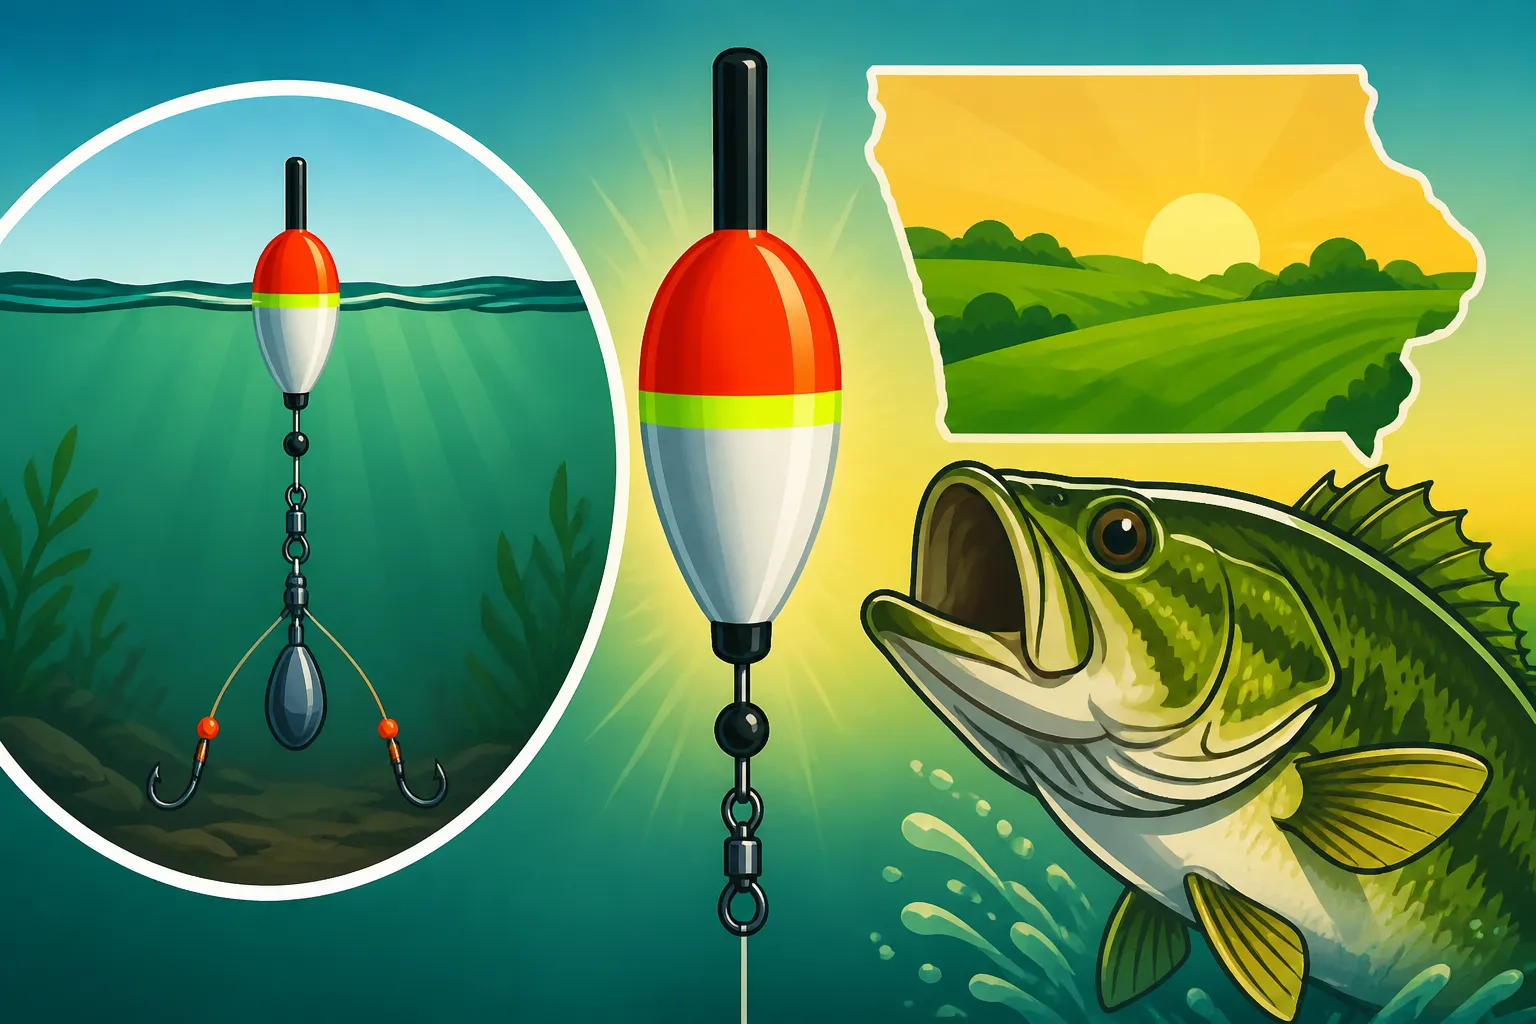
- Add Your Bead: Immediately after the thread stop, thread a small plastic or glass bead onto your main line. This bead is absolutely essential as it prevents your smaller thread stop from slipping through the larger hole of your slip bobber. The bead should be larger than the hole in your bobber but smaller than your rod guides.
- Add Your Slip Bobber: Next, thread your slip bobber onto the line, ensuring it moves freely.
- Add Second Bead (Optional): Some anglers like to add a second bead below the slip bobber, especially if the bobber has a larger hole on the bottom. This isn't always necessary but can provide extra protection for your line and help the bobber track better.
- Trim Tag Ends: Finally, trim the tag ends of the thread stop. Leave about 1/4 to 1/2 inch of tag end. Don't cut them too short, as this can cause the knot to unravel or slip. You want just enough length for the knot to hold securely.
Installing a Rubber/Silicone Bobber Stop
Rubber or silicone bobber stops are typically installed differently, often requiring a bit more care to avoid crimping your line.
- Prepare the Applicator: Most rubber stops come on a fine wire loop or a plastic applicator with a larger loop. Thread the end of your main fishing line through this larger loop.
- Slide the Stop: Gently slide the rubber or silicone stop off the applicator and onto your main line. Do this slowly and smoothly, minimizing any friction or sharp bends in your line. You might need to apply a little tension to your main line as you slide the stop.
- Position and Adjust: Once the rubber stop is on your main line, you can slide it up and down to adjust your depth. Again, be gentle. While these stops hold very securely, applying too much force when sliding can put stress on your line, especially if it's thinner. If you find it's too difficult to move, moisten your line slightly with water or saliva to reduce friction.
- Add Your Bobber: Since rubber stops are generally larger than thread stops, you often don't need an extra bead above your slip bobber with this type of stop. The rubber stop itself is usually large enough to prevent the bobber from passing over it. However, if your bobber has an unusually large line hole, you might still consider adding a bead for extra security. Thread your slip bobber directly below the rubber stop.
- Add Second Bead (Optional): As with thread stops, an optional second bead below the bobber can be added.
Integrating the Bobber and Hook
Regardless of the bobber stop type you choose, the general order of your rig below the stop remains consistent. This is crucial for proper function and presentation.
After your bobber stop (and bead, if applicable), and your slip bobber:
- Add Weight: Next, you'll typically tie on a swivel, and then add your chosen weight (split shot, pinch-on sinker, or a small sliding egg sinker) to get your bait down to depth and properly balance your bobber. Make sure your weight is sufficient to stand your bobber upright in the water but not so heavy that it drags the bobber completely under.
- Attach Leader and Hook: Below your weight, you'll attach a leader (if using one) and then your hook. The length of your leader will depend on how you want your bait to present below the weight. For example, a longer leader allows your bait to drift more naturally.
- Check Your Depth: Before casting, always check your desired depth. Measure from your hook up to your bobber stop. This is your effective fishing depth. Remember that for How to Fish Deep Structure With Electronics, you'll often have a very precise depth to hit, and your bobber stop will be key. This entire sequence is vital for ensuring your bait reaches the desired depth and presents naturally, maximizing your chances of a bite.
Troubleshooting Common Bobber Stop Issues in Iowa Waters
Even with the best intentions and proper setup, bobber stops can sometimes act up. It's not uncommon to face issues like stops slipping, getting tangled, or even causing line damage. Knowing how to diagnose and fix these problems can save your fishing trip from becoming a frustrating exercise.
Stops That Slip or Move
This is perhaps the most common and annoying bobber stop issue. You set your depth, cast, and then notice your bobber has settled much deeper than intended, or that your stop is sliding down your line with every retrieve.
Causes:
- Too Loose: The most obvious reason is that the stop isn't cinched down tightly enough on your main line. This often happens with thread stops if the knot isn't pulled securely, or if the material of the stop is too smooth for your line type.
- Wrong Type for Line: As we discussed, some thread stops struggle to grip slick braided lines, while certain rubber stops might be too large or too small for your specific line diameter, preventing a firm hold.
- Wear and Tear: Over time, especially with frequent adjustments, thread stops can wear out. The fibers can fray, losing their gripping power, or the rubber of a silicone stop can become stretched or less elastic.
- Heavy Weight/Current: If you're using heavy weights or fishing in strong currents (like sections of the Des Moines River), a standard stop might not have enough holding power against the constant pressure.
Solutions:
- Cinch Tighter (Thread Stops): For thread stops, ensure you pull both tag ends of your main line firmly, but not excessively, to tighten the knot onto the line. You want it snug, not strangling the line.
- Double Up: If a single thread stop continues to slip, try installing a second one directly below or above the first. This "double stop" or "sandwich" method often provides enough friction to prevent movement.
- Switch Types: If a thread stop isn't working on braided line, try a high-quality rubber or silicone stop designed for thinner lines, or a thread stop made from a coarser, grippier material. Conversely, if a rubber stop is damaging light mono, switch to thread.
- Replace Worn Stops: Don't be shy about replacing your bobber stops regularly, especially if you fish often. They're inexpensive, and a fresh stop can make a world of difference.
- Consider a Stronger Knot (DIY): If you're tying your own, experiment with a bobber stop knot that offers more friction or use a slightly heavier material for the knot itself.
Stops That Catch in Rod Guides
Nothing breaks the rhythm of casting like a bobber stop that snags at your rod tip, forcing a jerky retrieve or preventing a smooth cast.
Causes:
- Too Bulky: Some rubber or silicone stops are simply too large to pass smoothly through smaller rod guides, especially micro-guides found on many modern rods.
- Poor Knot Trimming: With thread stops, if the tag ends are left too long or are frayed, they can easily catch on the inside of the rod guides.
- Misaligned Knot: If a thread stop knot isn't seated perfectly and a loop or uneven section sticks out, it's more prone to catching.
Solutions:
- Trim Tags Tighter: For thread stops, carefully trim the tag ends closer to the main knot. Aim for about 1/8 to 1/4 inch. Use sharp scissors or clippers for a clean cut.
- Switch to Smaller Stops: If you consistently have issues with rubber stops, opt for smaller, more streamlined versions, or switch to thread stops entirely, as they tend to be less bulky.
- Test Your Setup: Before you hit the water, test your rig by reeling your bobber stop all the way up to the rod tip and back out a few times. This helps identify any snags or hang-ups before you're in the middle of a hot bite. This is especially important for situations where long, unimpeded casts are crucial, like Walleye Fishing Techniques for Iowa Lakes.
Line Damage and Breakage
A damaged line is a broken line, and a broken line means lost fish. Bobber stops, if misused, can contribute to line weakening.
Causes:
- Over-Tightening Rubber Stops: Trying to force a rubber stop that's too small onto a thick line, or pulling it too hard to adjust, can crimp and weaken the line.
- Poor Knot in Thread Stop: A badly tied DIY knot or even a poorly manufactured thread stop can have rough edges that abrade the line.
- Friction from Sliding: Constant, forceful sliding of any stop on the same section of line can cause friction, leading to wear and potential breakage.
Solutions:
- Gentle Handling: When installing or adjusting rubber stops, be gentle. If it feels like it's taking too much force to slide, it's likely too small for your line. Consider a larger size or a thread stop instead.
- Inspect Regularly: Before and after each trip, inspect the section of line where your bobber stop is positioned. Look for any fraying, crimps, or discoloration. If you see damage, re-tie your rig and replace the compromised section of line.
- Re-tie Periodically: Even if your line doesn't show obvious damage, it's good practice to re-tie your leader and check your main line periodically, especially after catching several fish or if you've been adjusting your depth frequently. This ensures the integrity of your entire fishing system. Learning How to Find Deep Holes for Catfish means you'll be adjusting depth often, so regular line checks are key.
Advanced Tips for Bobber Stop Success
Once you've mastered the basics, there are a few advanced strategies that can further enhance your bobber stop game, making your presentations even more precise and effective on Iowa's diverse waters.
Using Multiple Bobber Stops for Precision
While one bobber stop is usually sufficient, there are times when using two or even three can offer significant advantages, particularly for very specific depth control or when dealing with larger baits and stronger currents.
One common technique is to "sandwich" your slip bobber between two thread stops and two beads. The top stop sets your maximum depth, and the bottom stop acts as a buffer, preventing the bobber from sliding down too far towards your weight. This setup is excellent for ensuring your bait stays in a very narrow strike zone, or for minimizing tangles during aggressive casting. It essentially turns your slip bobber into a semi-fixed bobber for a specific depth range, but still allows for deeper casts.
Another approach is to set two stops at slightly different depths, especially when you're uncertain of the exact fish location within a water column. For example, you might have one stop set at 8 feet and another at 10 feet. This allows your bait to momentarily pause at the upper stop before slowly sinking to the lower stop, giving you two distinct presentations with a single cast. This can be particularly effective when fishing for suspended crappie or walleye that are actively moving up and down in the water column. Best Time of Year for Muskie Fishing in Iowa might call for such precise presentations.
Color Choice and Visibility
Believe it or not, the color of your bobber stop can sometimes make a difference. While most manufactured stops come in neutral colors, some brands offer bright fluorescent options like chartreuse, orange, or pink.
Brightly colored stops, especially thread stops, are fantastic for visibility. If you have trouble seeing your stop on your line, particularly in low light conditions or against busy backgrounds, a fluorescent stop can make depth adjustments much easier and quicker. This is a practical benefit that can save you time and frustration on the water. However, some anglers believe that very bright, highly visible stops, especially larger ones, might potentially spook wary fish in extremely clear water. While this is debated, it's something to consider.
For most situations in Iowa, visibility for the angler is the primary concern. A bright stop allows you to easily track your line and confirm your depth at a glance. Best Lure Color for Muddy Water highlights the importance of visibility in certain conditions, and while a bobber stop isn't a lure, the principle of being able to see your equipment efficiently still applies.
Seasonal Considerations for Bobber Fishing
The effectiveness and necessity of your bobber stop setup can vary with the seasons, impacting how and where you fish in Iowa.
- Spring: During Spring Fishing in Iowa, fish are often moving into shallower waters for spawning. You might find yourself fishing shallower depths, making precise bobber stop placement critical to hit those key staging areas. As water warms, fish might start suspending, requiring quick depth adjustments.
- Summer: In the heat of summer, many species move to deeper, cooler water or suspend over structure. Slip bobber setups with accurate bobber stops become invaluable for reaching these deeper zones without sacrificing casting distance. Think about targeting crappie suspended over brush piles in Rathbun Lake or walleye cruising deep breaks.
- Fall: As waters cool in the fall, fish can become more active, moving around in search of food. They might be at various depths. Having a reliable, easily adjustable bobber stop allows you to quickly experiment with different depths to locate the most active fish.
- Winter (Ice Fishing): While traditional slip bobbers aren't used in ice fishing, the concept of a "bobber stop" still applies in the form of setting precise depths for your ice fishing rig. Whether you're using a small spring bobber or a tiny float, the point at which your bait hangs below the ice is critical. Anglers often use small split shot or even specialized rubber stoppers on their main line to set a fixed depth below the ice. This ensures your jig or minnow is presented exactly where fish are holding, whether it's just off the bottom or suspended in the water column, much like Ice Fishing in Iowa requires precise depth control.
By considering these seasonal changes, you can adapt your bobber stop strategies to maximize your success throughout the year.
| Bobber Stop Type | Pros | Cons | Best Use Cases |
|---|---|---|---|
| Thread/String Stop | Highly adjustable, gentle on line, small. | Can slip on slick lines, hard to see, wears out. | Light line, panfish, clear water, subtle presentations. |
| Rubber/Silicone Stop | Very secure, durable, reusable. | Can crimp line, bulkier, may snag small guides. | Heavier lines, strong currents, larger fish (walleye, catfish). |
| DIY Knot Stop | Always available, customizable, zero cost. | Hard to tie consistently, less durable, can slip/fray. | Emergency repairs, custom needs, when pre-made stops aren't available. |
| Bead (with String Stop) | Essential buffer, protects knot, smooth. | Adds another component, must be sized correctly. | Almost all slip bobber setups with thread stops. |
Disclaimer
This article is for general informational purposes only and does not constitute professional advice. Laws, prices and regulations vary by location and change over time. Consult a qualified professional for guidance on your specific situation.