How to Rig a Crawler Harness for Walleye
There's nothing quite as frustrating as being out on the water, seeing those tell-tale arches on your fish finder, and knowing the walleye are there, but they just won't commit to your offering. Many Iowa anglers grapple with how to present a bait that's irresistible to these finicky fish. This comprehensive guide is dedicated to breaking down the art and science of rigging a crawler harness, a proven tactic that will transform those frustrating days into memorable walleye hauls across Iowa's diverse fisheries.
Understanding the Power of the Crawler Harness for Iowa Walleye
For many seasoned walleye anglers, the crawler harness isn't just a lure; it's an institution. It represents a potent combination of natural bait appeal and eye-catching attraction that walleye often find impossible to ignore. If you've ever found yourself struggling to entice a bite, a properly rigged and presented crawler harness could be the game-changer you need.
Why Crawler Harnesses are a Walleye Angler's Secret Weapon
The primary allure of a crawler harness lies in its use of a live nightcrawler, arguably one of the most effective natural baits for walleye. Walleye have an incredible sense of smell, and the subtle scent trail left by a juicy nightcrawler drifting through the water is a powerful attractant, especially when fish are less active or in stained waters. The harness ensures that this live bait is presented in an incredibly natural and enticing way, allowing the crawler to undulate enticingly.
Beyond the live bait, the harness itself adds a crucial element: flash and vibration. The spinning blade creates an irresistible visual flash, mimicking a fleeing baitfish, while also generating vibrations in the water that walleye detect with their lateral lines. This dual appeal – scent from the live bait and visual/vibrational attraction from the blade – makes the crawler harness incredibly versatile, effective in various conditions from the sprawling depths of Fishing the Iowa Great Lakes to the current-swept channels of Fishing the Mississippi River in Iowa. I've had days on Clear Lake where nothing seemed to work, only to switch to a chartreuse blade harness with a fresh 'crawler and suddenly the rod tip starts bouncing. It truly feels like a secret weapon at times.
Essential Components of a Walleye Crawler Harness
To truly master the crawler harness, it's vital to understand each component and its role in the overall presentation. This isn't just a random assortment of fishing tackle; each part is carefully chosen to work in harmony.
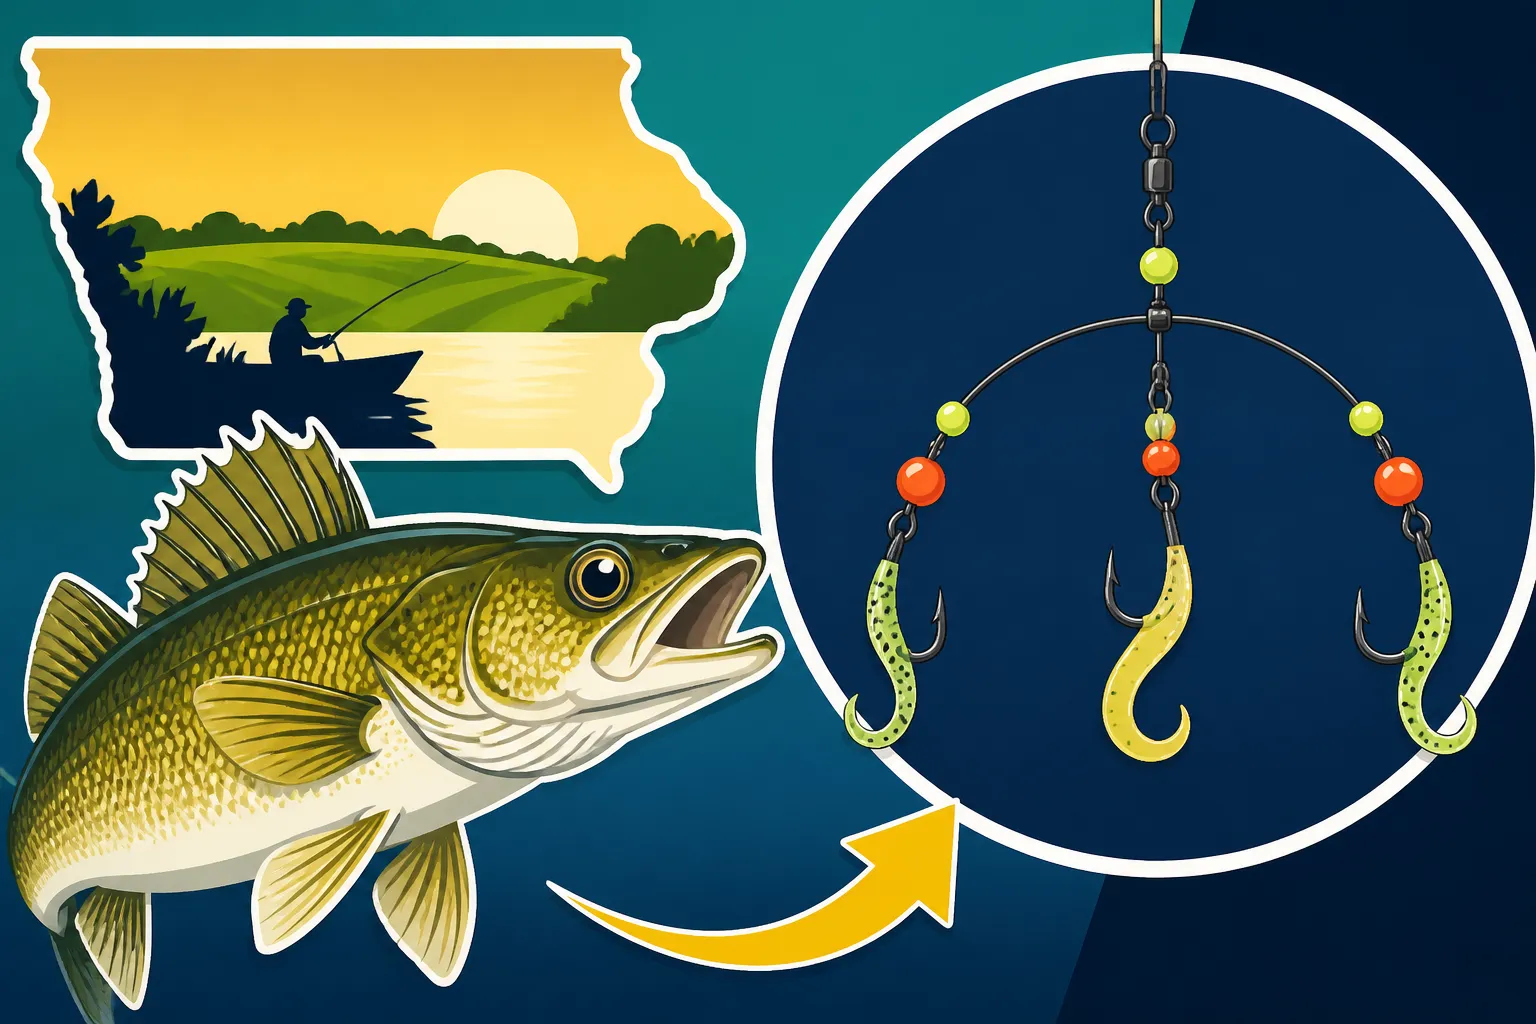
At its core, a crawler harness consists of a leader line, typically made of fluorocarbon or monofilament, which is far less visible in water than standard fishing line. Attached to this leader are two or three hooks, usually snelled in tandem to accommodate the length of a nightcrawler. This tandem hook setup ensures that whether a walleye strikes short or inhales the whole bait, you've got a good chance of a solid hookset. Following the hooks, a series of brightly colored beads are threaded onto the leader, serving multiple purposes: they add visual attraction, create separation between the blade and the hooks, and protect the knots from abrasion.
The most distinctive feature is, of course, the blade. These come in various shapes and sizes, each designed to perform differently in the water. Colorado blades are wide and round, producing maximum vibration and lift at slow speeds, making them perfect for murky water or when walleye are lethargic. Indiana blades offer a middle ground, providing good flash and vibration with moderate lift. Willow Leaf blades are long and slender, designed for faster trolling speeds and less drag, ideal for clear water or when you need to cover a lot of ground quickly. Finally, a clevis holds the blade, allowing it to spin freely as the harness moves through the water, which is paramount for generating that enticing flash and vibration.
Step-by-Step Guide to Rigging Your Own Walleye Crawler Harness
While you can certainly buy pre-made crawler harnesses, learning to rig your own offers immense satisfaction, customization options, and often, better performance. Plus, it's a great way to fine-tune your setup for the specific conditions you're facing on Iowa's waters.
Gathering Your Materials and Tools
Before you start, make sure you have all the necessary components. A little preparation goes a long way in ensuring a smooth rigging process. You'll need:
- Leader Line: 10-17 pound test fluorocarbon or monofilament. Fluorocarbon is excellent for its low visibility and abrasion resistance, while monofilament offers more stretch and is often more budget-friendly.
- Hooks: #2 to #6 octopus style or snelled Aberdeen hooks. Ensure they are sharp!
- Beads: 5mm to 8mm in various colors. Fluorescent colors (chartreuse, orange, pink) are popular for stained water, while more natural colors (pearl, clear) work well in clear conditions. You can find large assortments of beads and hooks on platforms like Amazon if you're looking to stock up efficiently.
- Blades: Assorted sizes and colors (e.g., #3-#5 Colorado, Indiana, Willow Leaf). Gold, silver, copper, and painted patterns (firetiger, perch, chartreuse) are all effective.
- Clevises: Quick-change clevises are super convenient, allowing you to swap blades without re-tying.
- Swivels: Barrel or ball bearing swivels (size 7-10) to prevent line twist.
- Tools: Scissors or line clippers, a measuring tape, and a knot-tying tool (optional, but helpful for consistent knots).
Investing in quality components, especially hooks and leader line, pays dividends in the long run. Cheap hooks dull quickly and can bend under pressure, costing you that trophy walleye.
Assembling the Leader and Hooks
This is where your harness begins to take shape. The length of your leader is crucial and can depend on your fishing style. For trolling with bottom bouncers, a 3- to 6-foot leader is common. For casting or drifting in shallower waters, you might opt for a shorter leader, around 18-24 inches, to maintain better control.
Start by cutting your chosen leader line to the desired length. For a two-hook tandem rig, which is most common for nightcrawlers, you'll first tie on your trailing hook. A snell knot is ideal here as it allows the hook to lay in line with the leader, maximizing your hookup ratio. Once your first hook is secured, measure out about 2.5 to 3 inches of line, and then snell your second hook. This spacing is critical to allow the nightcrawler to stretch out naturally without bunching up. The eye of the second hook should point in the opposite direction of the trailing hook, which helps the nightcrawler stay straight. Some anglers even add a third hook for extra-long 'crawlers, but two is generally sufficient. If you're fishing in clear water, opt for a longer leader to keep your weight further from the bait, and consider a lighter fluorocarbon like 10-12lb test to enhance stealth.
Adding Beads, Blades, and Clevis
Now for the bling! Beads serve to add visual appeal, space the blade from the hooks, and protect your knot at the swivel from the clevis rubbing against it. Typically, you'll thread 3-5 beads above the top hook, followed by the clevis with your chosen blade.
The order matters:
- Beads: Thread them onto the leader above your top hook. Experiment with color combinations. Sometimes a mix of bright and translucent beads can mimic insect larvae or add an extra flash.
- Clevis & Blade: Once the beads are on, slide your clevis onto the line, and then attach your blade to the clevis. Make sure the clevis is positioned so the blade spins freely. This is paramount for the harness to work correctly. A non-spinning blade is just a piece of metal, offering no flash or vibration. If you're using a quick-change clevis, you can easily swap out blades later to adapt to changing conditions.
- More Beads: After the blade and clevis, you might add another 1-2 beads, or even a small plastic spacer, before tying on your swivel. This creates additional separation and cushioning. This layered approach ensures that the blade has plenty of room to rotate and generate maximum attraction.
When selecting bead and blade colors, think about the water you're fishing. In murky waters, bright, fluorescent colors like chartreuse, orange, or hot pink really stand out. In clearer water, more subtle or metallic colors like silver, gold, or pearl often work best. You can find a huge variety of these components, often in bulk, on platforms like Amazon, allowing you to experiment freely.
Attaching the Swivel and Main Line
The final step in rigging your crawler harness is attaching a swivel. A high-quality barrel or ball-bearing swivel is essential to prevent line twist, which can be a real headache, especially when trolling or drifting. Line twist weakens your line and can cause tangles.
Tie one end of the swivel to the end of your leader line (above the beads and blade assembly). A strong, reliable knot like a Palomar knot or an improved clinch knot is perfect here. Ensure the knot is snug and trim any excess tag end. The swivel acts as a connection point between your crawler harness and your main fishing line. When you're ready to fish, you'll simply tie your main line (or your bottom bouncer or inline weight) to the other end of the swivel. This also makes changing harnesses quick and easy, allowing you to adapt to different blade colors or styles without having to re-tie your entire setup. For maximum versatility, consider using a quick-snap swivel on your main line so you can easily clip on or remove your bottom bouncer or a pre-tied harness.
Fishing Techniques and Tips for Crawler Harness Success in Iowa
Rigging a perfect crawler harness is only half the battle; knowing how to present it effectively is where you truly unlock its potential for catching walleye in Iowa. These adaptable rigs can be fished in multiple ways, depending on the conditions and the specific water body.
Presenting Your Crawler Harness Effectively
The beauty of the crawler harness lies in its versatility. It's not a one-trick pony.
- Trolling: This is arguably the most common and effective way to fish a crawler harness. By slowly trolling behind a boat, you cover a lot of water, bringing your bait to cruising walleye. Ideal trolling speeds typically range from 0.8 to 1.5 miles per hour, allowing the blade to spin freely and the nightcrawler to undulate naturally. You'll often use a bottom bouncer or an inline weight to get your harness down to the desired depth. Planer boards can be employed to spread out your lines, covering an even wider swath of water, especially on larger lakes like Rathbun Lake or the Iowa Great Lakes. Remember, consistency in speed and depth is often key.
- Drifting: When fishing rivers or windy lakes, drifting can be an incredibly productive technique. Let the current or wind naturally move your boat, presenting your harness along drop-offs, breaks, or river channels. Use enough weight (e.g., a bottom bouncer) to keep your harness near the bottom, but light enough so it occasionally ticks the substrate without constantly snagging. This technique excels in scenarios where walleye are scattered or less active, as the natural drift imitates a struggling baitfish.
- Casting and Retrieving: While less common than trolling or drifting, casting a crawler harness can be effective in shallower areas, around weed lines, or when targeting specific structures from shore. Use a lighter bottom bouncer or even a split shot to give it some casting weight, and retrieve it slowly, just fast enough to get the blade spinning. This can be particularly useful in smaller Iowa farm ponds or at certain times of year when walleye move shallow. Just ensure your nightcrawler stays on the hook!
Regardless of the technique, always use fresh, lively nightcrawlers. A dying or shriveled crawler loses much of its effectiveness. You can find more comprehensive strategies in our guide on How to Catch Walleye in Iowa.
Optimizing Your Setup for Different Iowa Conditions
The ability to adapt your crawler harness setup to prevailing conditions is what separates a good angler from a great one. Every element, from blade type to color, plays a role.
- Blade Selection: This is paramount. As discussed, Colorado blades are your go-to for slow trolling, murky water, or when fishing in heavy current, as their wide profile generates maximum vibration and lift. Indiana blades are a good all-around choice. Willow Leaf blades excel when you need to cover water quickly, troll at higher speeds, or when fishing in clear water where a more subtle flash is preferred. Consider the water clarity: bright, flashy blades like nickel or chrome are great for sunny days and clear water, while painted blades (chartreuse, orange, firetiger) really pop in stained or cloudy conditions.
- Color Choices: This applies to both your blade and your beads. Walleye can be very finicky about color. Generally, natural colors (silver, gold, black, white, perch patterns) work well in clear water, mimicking natural forage. In stained or muddy water, or during low light conditions (dawn, dusk, or even How to Catch Walleye at Night), switch to brighter, fluorescent colors like chartreuse, orange, or hot pink to maximize visibility. Sometimes, a combination of both, like a gold blade with chartreuse beads, can be deadly.
- Weighting the Rig: The goal is to get your crawler harness to the right depth. Bottom bouncers are excellent for keeping your bait close to the bottom while trolling or drifting. They come in various weights (½ oz to 3 oz or more). Inline weights or snap weights are good alternatives, especially when targeting suspended fish or when you want a more subtle presentation without the bulk of a bouncer. Always choose the lightest weight that allows you to maintain bottom contact (or your desired depth) at your chosen speed. Understanding How Deep to Fish for Walleye in Spring will help you choose the correct weighting strategy.
| Blade Type | Shape | Speed Preference | Vibration | Flash | Optimal Conditions |
|---|---|---|---|---|---|
| Colorado | Wide, Round | Slow | High | Moderate | Murky/Stained water, slow trolling, lethargic fish, low light. Generates strong thumping action. |
| Indiana | Oval | Medium | Medium | Good | All-around versatile blade, good for a range of speeds and water clarities. |
| Willow Leaf | Long, Slender | Fast | Low | High | Clear water, faster trolling, when fish are active and chasing. Mimics slender baitfish. |
Hooking and Handling Walleye with a Crawler Harness
The bite of a walleye on a crawler harness can often be subtle, especially when trolling. It's rarely a violent strike.
- Detecting the Bite: When trolling, you'll often see your rod tip load up slightly or start pulsing erratically. It might feel like a light tap or a gradual increase in resistance. Don't immediately set the hook! Walleye often "mouth" the bait first.
- The "Feed Line" Technique: This is crucial. When you detect a bite, momentarily drop your rod tip back (or even briefly disengage your reel) to give the walleye a few seconds to fully inhale the nightcrawler. This "feed line" allows the fish to commit without feeling immediate resistance from the boat. Count to 3-5 seconds, sometimes even longer depending on how aggressive the bite feels.
- Setting the Hook: After feeding line, reel up the slack until you feel the weight of the fish, then sweep the rod upwards and to the side in a smooth, firm motion. Avoid a violent jerk, as it can pull the hooks free. Walleye mouths are bony, so a firm, sweeping hookset is vital for good penetration.
- Careful Handling: Once landed, handle walleye with care. If you plan to release them, use a net to minimize stress, keep them in the water as much as possible, and use pliers or a hook remover to quickly extract the hooks. If you're keeping them for the table, be mindful of Iowa Fishing Daily Bag Limits Guide and Walleye Season and Size Limits, and dispatch them humanely to ensure the best meat quality. Always check local regulations, as rules can vary, particularly for protected species or special waters.
Disclaimer
Fishing regulations, license requirements, and local conditions in Iowa can change. Always consult the latest official Iowa Department of Natural Resources (DNR) regulations before heading out on the water. This guide is for informational purposes only and should not replace official sources.