How to Anchor a Kayak in Current
If you've ever tried to fish from a kayak in one of Iowa's beautiful, but often flowing, rivers or even in a lake where the wind has decided to pick up, you know the struggle: you find the perfect spot, make a cast, and before you know it, you're drifting away, your lure long past the strike zone. It's frustrating to constantly paddle back into position when all you want to do is focus on that bite. This guide is all about helping you conquer that current, safely and effectively anchoring your kayak so you can enjoy more time fishing and less time paddling.
Why Anchoring in Current is a Game-Changer (and a Challenge)
Fishing from a kayak offers incredible access to waters that bigger boats can't reach, letting you get into those secluded backwaters, quiet coves, or tight river bends where the big ones often hide. However, that nimble advantage quickly becomes a disadvantage when you're battling a steady current or strong winds. Your kayak, being lightweight and having minimal hull in the water, is easily pushed around. This constant drift means you're rarely able to thoroughly work a prime fishing spot, whether it's a logjam on the Des Moines River or a rocky point on the Mississippi.
The Frustration of Constant Drifting
Picture this: you've spent an hour paddling upstream against a moderate current on the Cedar River, your arms burning, but you finally spot a promising eddy next to an undercut bank, perfect for a lurking smallmouth bass. You position yourself, make a careful cast with your favorite crankbait, and just as it's swinging into the sweet spot, the current grabs your kayak, and you're pulled sideways, ruining the retrieve. You paddle back, try again, and the same thing happens. It's not just annoying; it can genuinely impact your fishing success and turn what should be a relaxing outing into an exhausting chore. Without a stable platform, you can't present your bait effectively, maintain proper line tension, or even set the hook with confidence.
Safety First: Understanding the Risks
While anchoring might seem like the obvious solution, doing it incorrectly in current can actually be quite dangerous. A kayak, especially a sit-on-top, is designed to ride on the water. If you drop an anchor directly off the bow or stern in strong current, the boat can quickly become perpendicular to the flow. This broadside presentation increases drag dramatically, making your kayak unstable and potentially leading to capsizing. Imagine your kayak being pinned against a submerged log or rock by the current with an anchor rope holding it firm. It's a scary scenario that can happen quickly. That's why understanding proper technique and having the right equipment is absolutely crucial, not just for catching fish, but for your safety on the water.
Choosing the Right Anchor for Kayak Fishing in Current
When it comes to kayak anchors, one size certainly doesn't fit all, especially when dealing with moving water. The "best" anchor really depends on the type of bottom you'll be fishing over and the strength of the current. You're looking for something that will dig in and hold, but also be manageable to retrieve without completely exhausting yourself.
Different Anchor Types for Different Bottoms
Iowa's waters offer a variety of river and lake bottoms, from muddy flats to rocky stretches and areas strewn with logs. Your anchor needs to be up to the task:
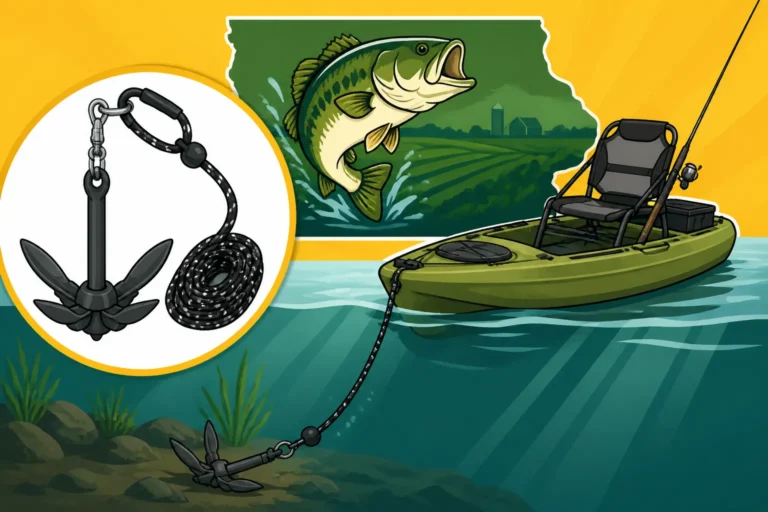
- Folding Grapple Anchors: These are probably the most popular choice for kayak anglers, and for good reason. They have four prongs that fold in for compact storage, making them easy to stow in a small kayak. When deployed, these prongs spread out and are excellent at grabbing onto rocky bottoms, weeds, or even submerged branches. They tend to hold well in moderate current. You can find these readily available at Bass Pro Shops or on Amazon.
- Mushroom Anchors: These are best suited for soft, muddy, or sandy bottoms often found in slower moving rivers or lake coves. Their shape creates a suction effect, helping them hold. However, in strong current over a hard bottom, they're often just going to drag. They are generally heavier for their holding power compared to grapple anchors.
- Drag Chains/Drift Anchors: Not strictly anchors in the traditional sense, but drag chains are simply a heavy length of chain (or specialized drag anchors) without flukes, designed to slowly drag along the bottom. They don't provide a stationary hold but are excellent for slowing your drift in current, allowing you to thoroughly fish a stretch of river. This can be very effective for covering water methodically without being completely stationary.
- Stake-Out Poles: These are long, sturdy poles, usually made of fiberglass or aluminum, that you manually push into the bottom to anchor. They are fantastic for shallow water (usually 6-8 feet deep or less) with soft to moderately firm bottoms. They offer silent deployment and quick release, perfect for spooky fish in skinny water. However, they are useless in deep water or over very rocky/hard bottoms.
| Anchor Type | Best Bottom Type | Current Holding Power | Pros | Cons |
|---|---|---|---|---|
| Folding Grapple | Rocks, Weeds, Woody Debris | Moderate to Strong | Compact, excellent grip, versatile | Can get snagged, may not hold well on soft mud |
| Mushroom | Mud, Sand, Silt | Weak to Moderate | Good on soft bottoms, less likely to snag | Poor on hard/rocky bottoms, heavier for hold |
| Drag Chain/Drift | Varied, but best on soft | Slows Drift Only | Great for covering water slowly, simple | Doesn't provide stationary hold, can still snag |
| Stake-Out Pole | Soft to Firm (Shallow) | Moderate to Strong | Silent, quick deployment, no rope needed | Only for shallow water, useless on hard bottoms |
Weight Considerations for Current
The general rule of thumb for kayak anchors is to go heavier than you think, especially for current. A typical recommendation for a kayak in calm water might be a 1.5 to 3-pound anchor. However, for a river with noticeable current, you'll want something in the 3 to 6-pound range, and sometimes even heavier depending on the conditions. The goal isn't just to feel it hit the bottom, but for it to dig in and hold your kayak firm against the persistent pull of the water. If you find your anchor dragging consistently, it's either too light for the current or the wrong type for the bottom.
Essential Rigging for Safe and Effective Anchoring
Having the right anchor is only half the battle. How you connect it to your kayak, and the systems you use to manage your anchor line, are arguably even more critical, especially when fishing in current. These rigging choices determine your safety, ease of use, and overall fishing experience.
The Anchor Trolley System: Your Best Friend in Current
If you're going to anchor in current, an anchor trolley system is not just recommended, it's practically mandatory. A trolley allows you to move your anchor attachment point along the side of your kayak, from the bow all the way to the stern, without ever having to lean over dangerously. This is vital for safety in current.
Imagine this: you drop your anchor from the middle of your kayak. The current hits your broadside, and you feel unstable. With a trolley, you can pull a line to move the anchor attachment point all the way to the bow, facing your kayak into the current. This makes your kayak much more hydrodynamic, stable, and less likely to capsize. When you're ready to move or if the current shifts, you can move the attachment point to the stern to pivot your kayak, or release it entirely. Best Kayak Anchor System articles often highlight the trolley for its versatility.
A typical anchor trolley consists of a ring (or two rings and a bungee) that slides along a continuous loop of rope, which is itself run through pulleys mounted near the bow and stern of your kayak. This allows you to position your anchor line exactly where you need it for optimal stability.
Quick-Release Mechanisms: Non-Negotiable for Safety
This is the single most important safety feature for anchoring in current. Things can change quickly on the water – a sudden surge of current, a submerged obstacle appearing out of nowhere, or your anchor getting hopelessly snagged. In these situations, you need to be able to instantly free yourself from your anchor line.
A quick-release mechanism typically involves a cleat or jam cleat that allows you to secure your anchor line, but also provides for an instant, one-handed release. Some anglers even incorporate a cutting tool (like a sharp knife or line cutter) easily accessible on their PFD or kayak, as a last resort, but a mechanical quick-release is always the first line of defense. Remember, when you're anchored in current, that anchor line is a direct connection to a potential hazard. Being able to sever that connection without fumbling could save your life or your kayak.
The Right Anchor Line and Management
Don't skimp on your anchor line! You'll want a strong, durable rope that's easy to handle and won't stretch excessively. Braided nylon or polypropylene rope is common. The diameter should be thick enough to hold comfortably in your hand, even when wet. As for length, a good rule of thumb is to have at least 3-5 times the depth of the water you'll be fishing in. So, if you're fishing in 10 feet of water, you'll want 30-50 feet of anchor line. This allows for enough scope (angle of the line to the bottom) for the anchor to dig in properly and hold.
Managing all that line is where a good system comes in. An anchor line winder or a small mesh dive bag is great for keeping your rope neatly coiled and tangle-free. This is especially important for quick, safe deployment and retrieval, preventing the line from getting tangled around your feet, fishing gear, or even the propeller of a trolling motor. Losing your grip on a long, unmanaged line in current can quickly create a mess, or worse, a hazard.
Step-by-Step: Anchoring Your Kayak in Current
Now that you've got the right gear, let's talk about the process. Anchoring a kayak in current isn't just about dropping the weight; it's a strategic maneuver that prioritizes safety and stability. Following these steps will help ensure a successful and enjoyable fishing experience.
Approaching Your Desired Position
This is where strategy begins. Don't paddle directly to your spot and then try to anchor. Instead, approach from upstream of your target area. Give yourself plenty of room. As you get close, begin to slow your kayak's drift with gentle paddle strokes, assessing the current strength and looking for any potential snags or hazards downstream. This upstream approach allows you to "back into" your spot, making adjustments as needed. Think of it like docking a boat; you always want to approach slowly and with control. If the current is strong, consider where you'd drift if your anchor didn't hold. You need a clear path for that eventuality.
Deploying Your Anchor Safely
Once you're slightly upstream from your target, it's time to deploy.
- Attach to Trolley: First, ensure your anchor line is securely clipped to the ring of your anchor trolley.
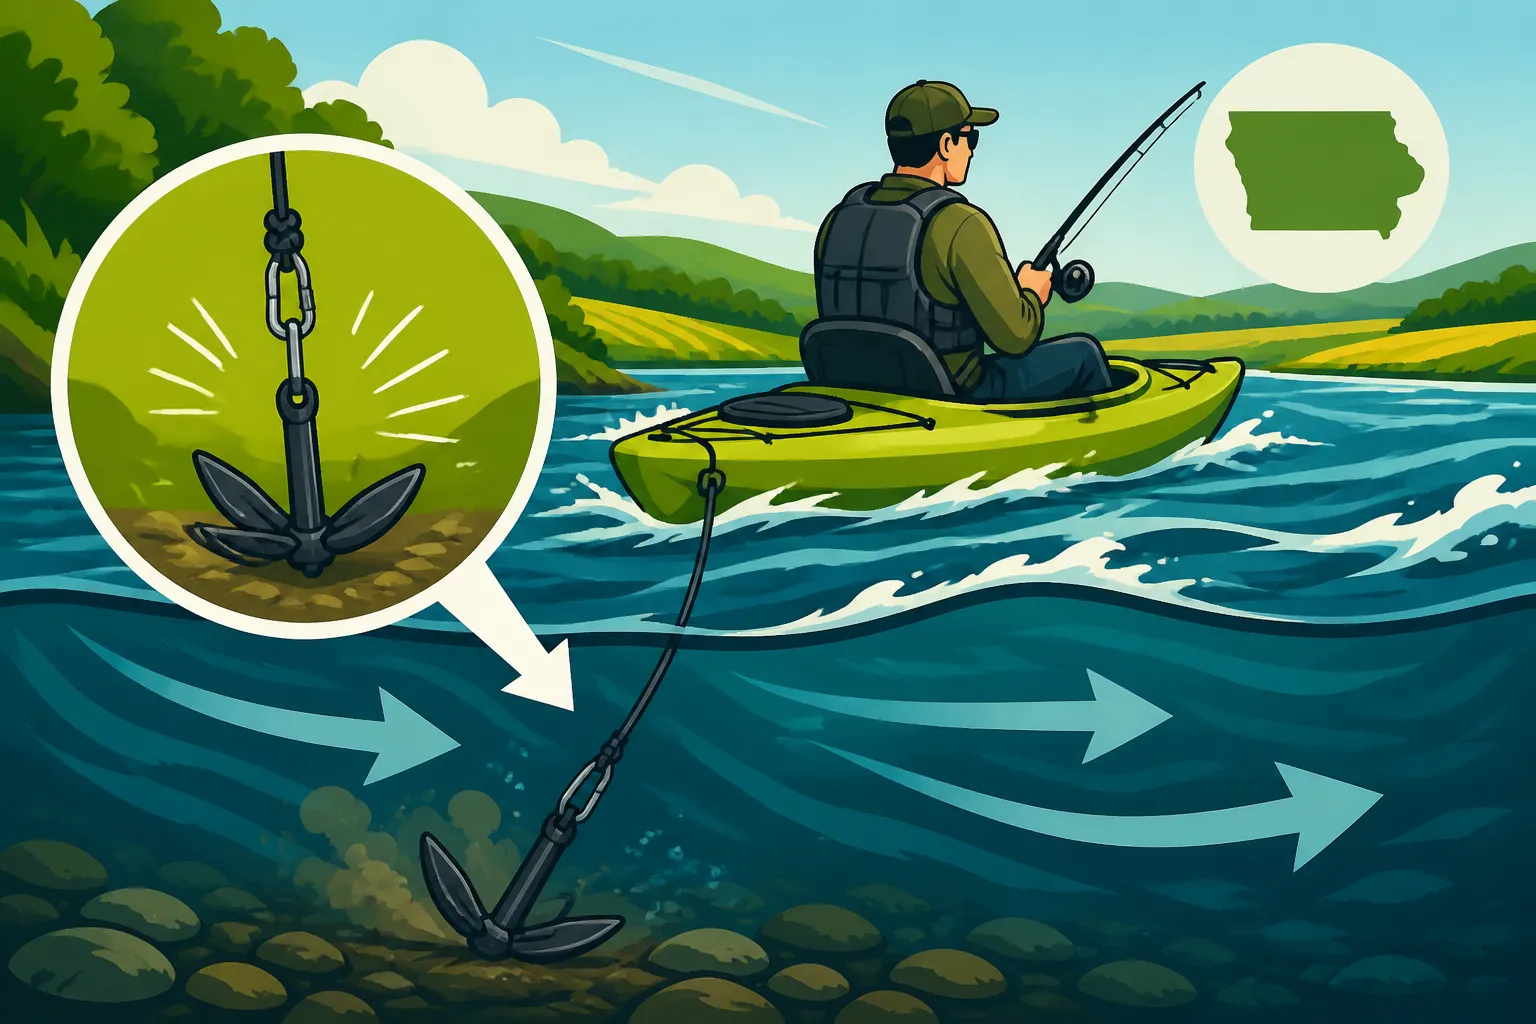
- Move Trolley Forward: Slide the trolley ring all the way to the bow (front) of your kayak. This is crucial. You want your kayak to point directly into the current, presenting the smallest profile possible. This position offers maximum stability and minimizes the risk of capsizing.
- Lower, Don't Throw: Gently lower your anchor into the water, letting out line as you drift downstream. Don't just chuck it out! Letting it down slowly prevents it from fouling the line and helps it settle properly on the bottom. Keep a hand on the line, feeling for the anchor to hit bottom and then to set.
- Let Out Scope: Once the anchor hits bottom and starts to drag, let out more line. You need enough scope for the anchor to dig in. As mentioned, 3-5 times the depth is a good starting point. You'll feel the anchor grab and your kayak will slow and eventually stop, pointed directly upstream into the current.
- Secure the Line: Once you're holding steady, secure your anchor line to your quick-release cleat. Double-check that it's snug but can be released instantly with a single motion.
Managing Your Position and Retrieval
Even with a good anchor, currents can shift, and you might want to adjust your position slightly. This is where the anchor trolley really shines for Kayak Fishing Techniques in Iowa.
- Adjusting Position: If you want to move left or right while staying anchored, simply paddle slightly. The trolley allows your kayak to pivot around the anchor point. You can also slowly retrieve or let out a bit of anchor line to move a few feet upstream or downstream.
- Releasing and Retrieving: When you're ready to move on, the process is largely the reverse, with a focus on quick safety:
- Quick Release: Always be prepared to use your quick-release. If the anchor is truly stuck or a dangerous situation arises, ditch the anchor! It's cheaper to replace an anchor than a kayak or deal with an injury.
- Retrieve Line: Unclip your line from the cleat and start pulling in the anchor line, hand over hand, coiling it neatly into your storage bag or winder.
- Move Trolley Back: As you retrieve, you may want to move the trolley ring towards the middle or stern of your kayak to make retrieval easier and maintain stability as you start to drift again.
- Clear the Water: Once the anchor is completely out of the water, secure it so it doesn't swing around.
It's a good idea to practice these steps in calm water first, so they become second nature before you tackle a strong current. You want to be able to do this smoothly and instinctively.
Troubleshooting and Advanced Tips for Current Anchoring
Even with the best gear and technique, Mother Nature can throw curveballs. Strong gusts, unexpected current surges, or a stubborn snag can make anchoring a challenge. Knowing how to troubleshoot and applying some advanced strategies can make a big difference.
Dealing with Snags
One of the most common frustrations when anchoring, especially in rivers, is getting your anchor snagged on rocks, roots, or debris. This is where a little ingenuity, and sometimes sacrifice, comes into play.
- The Anchor Retrieval Ring Method: For grapple anchors, a common trick is to attach your anchor line to the bottom eye of the anchor, not the top. Then, run the line up the shaft and secure it with a small zip tie or piece of thin monofilament at the top eye. If the anchor gets snagged, a strong, steady pull will break the zip tie, allowing you to pull the anchor out from the bottom, releasing it from the snag. It’s like a cheap, effective breakaway system.
- Sacrifice the Anchor: Seriously, sometimes it's better to cut your losses (and your line) than to risk capsizing or getting into a dangerous situation trying to retrieve a hopelessly snagged anchor. That's why having an accessible knife or line cutter is a smart backup, and why you should never spend a fortune on your primary anchor for river fishing. You can always get a replacement at Bass Pro Shops or order one on Amazon.
Using Two Anchors (Advanced Technique)
For situations requiring extreme stability or precise positioning, particularly in strong currents or where you want to keep your kayak broadside to a specific structure (like a wing dam on the Mississippi River), some experienced kayak anglers use two anchors. This is an advanced technique and requires careful management.
- Fore and Aft: One anchor is deployed from the bow and another from the stern (using two separate anchor trolleys, or one trolley with a split line). This essentially "locks" your kayak in place, preventing any swing. This could be useful for targeting specific areas like a fish crib in a lake or a small pool in a river.
- Broadside Stability: For very strong currents, deploying a heavy anchor upstream and then a lighter anchor slightly downstream and off to the side can help you maintain a specific angle to the current for presentation, while still providing stability. This is extremely niche and requires practice. Remember the capsize risk when broadside to current, so this is for experienced paddlers only and in specific, lower-risk scenarios.
Using a Drift Sock/Sea Anchor
While not an anchoring device in the traditional sense, a drift sock (also known as a sea anchor or drift anchor) is an excellent tool for controlling your drift in current or wind. It’s a parachute-shaped device that creates drag in the water, slowing your kayak's movement significantly.
- Controlled Drift: If you want to fish a long stretch of river slowly and methodically, a drift sock is far better than constantly deploying and retrieving an anchor. It allows you to present baits or lures naturally with the current without being swept away too quickly.
- Managing Position: By attaching the drift sock to your anchor trolley, you can even fine-tune your drift direction to some extent, allowing you to work specific structures more thoroughly. This is a fantastic option for covering water while still maintaining control. For more general kayak fishing gear, check out our Kayak Fishing Gear Guide for Iowa Rivers.
Remember that understanding Iowa Fishing Regulations Explained is also critical, especially if you're experimenting with advanced techniques that might involve multiple lines or specific anchor setups. Always prioritize safety over catching the biggest fish. Our How to Fish From a Kayak Safely guide provides more details on general safety practices.
Maintaining Your Anchoring Gear
Just like your fishing rods and reels, your anchoring system needs a little love to ensure it performs reliably when you need it most. A well-maintained system is a safe system.
Regular Inspection
Before and after every trip, especially if you've been in current, take a few minutes to inspect your entire anchoring setup.
- Anchor Line: Check your anchor line for any fraying, nicks, or weak spots. Pay particular attention to the first few feet of line that might rub against the bottom or your kayak's hull. Saltwater (or heavily mineralized Iowa river water) and UV exposure can degrade rope over time. If you see significant wear, it's time to replace it.
- Pulleys and Cleats: Ensure that your anchor trolley pulleys spin freely and aren't corroded or jammed. Check that your quick-release cleat is securely mounted and functions smoothly. Any stiffness could be a serious problem when you need to release quickly.
- Anchor Itself: Look for bent flukes on grapple anchors or excessive wear on mushroom anchors. Make sure any folding mechanisms on grapple anchors are still working properly.
Cleaning and Storage
After your fishing trip, especially if you've been in muddy or silty water, give your anchor and line a good rinse with fresh water. This removes grit and corrosive elements that can shorten the life of your gear. Hang your anchor line to dry completely before storing it. Storing a wet, coiled rope can lead to mildew and degradation. Keep your anchor, line, and trolley components out of direct sunlight when not in use to prevent UV damage. Proper storage will extend the life of your gear and ensure it's ready for your next adventure on Iowa's beautiful waters.
By understanding the nuances of how to anchor a kayak in current, you're not just improving your chances of catching fish; you're significantly enhancing your safety and overall enjoyment on the water. Now go out there and stick some fish without constantly fighting the drift!
Disclaimer
This article is for general informational purposes only and does not constitute professional advice. Laws, prices and regulations vary by location and change over time. Consult a qualified professional for guidance on your specific situation.